In the second post in the getting started with Docker series we’ll look at using Docker to allow us to guarantee the tools and frameworks used to build and run an application even if we no longer have those tools installed on our current machine.
It will also enable us to run multiple potentially incompatible versions of tools and frameworks so we can run an old and new version of an application side by side.
Sample scenario
Let’s imagine you’ve been tasked with updating a website that was built with Angular CLI version 1 on Node 6.9.0. You don’t want to rollback your installed versions of Node and Angular and anyway you’d like to run the old and new versions side by side so you can make sure everything renders the same.
This is a really easy to do with Docker, so let’s get started!
Pre-requisites
This post assumes that you already have Docker installed.
In this post I am using Linux containers, but the principle works equally well with Windows Containers
Sample app
The principles here work for any Angular app, but, if you want to code along, the source code for the app I’m using is at https://github.com/paxdev/docker-demo.
How a Docker build works
A Docker Image is built from a Context and a Dockerfile.
The Context is the set of files sent to the build engine, and the Dockerfile is a set of instructions to perform on those files to build the final image.
Each command is run in turn and creates a new layer in the image.
The format of the command is
docker build <<options>> <<path-to-context>>
The simplest format being docker build -t <<image-name>>:<<tag-name>> .. That will send the current path to the docker engine and try to build a dockerfile with the default name of Dockerfile. If we have not used the default file name we can specify a filename using -f.
Selecting a base image
All Docker builds start with a base image to work on. This will be a minimal set of tools and runtimes for our apps to use.
The simplest Linux image is scratch, which contains very little on top of the base kernel.
In practice it is of little use, since it doesn’t even include a shell, so you would find it extremely difficult to debug if something went wrong.
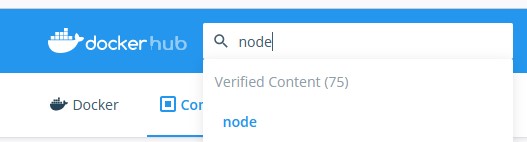
Many Linux images are built on Alpine which is a minimal Linux distro. For our purposes we’ll need an image containing Node and luckily there is a verified Node image on Docker hub.
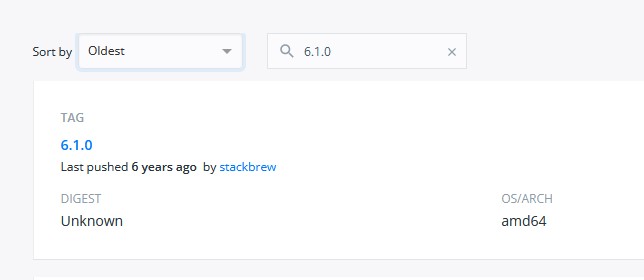
If I select the Tags tab I can filter by version and sort by the oldest or newest version
Creating a Dockerfile
Create a file called Dockerfile and open in your favourite editing tool. We specify the base image using FROM
FROM node:6.9.0
Save the file and then we’ll build and run our image
docker build -t docker-example:0.1 .
docker run --rm -it docker-example:0.1 /bin/bash
We’re now in a bash session on our container. We can run node -v and confirm that this image does indeed have the desired version of node installed. exit the session to continue.
Installing tools / Running commands on the image
There are no official base images containing the Angular CLI so we will need to install it ourself. We can run arbitrary commands using RUN. Add the following line to the dockerfile:
RUN npm install -g @angular/cli@1.0.0
We’ll now build and run our image. (There’s an npm install involved. Probably a good idea to grab a coffee!)
docker build -t docker-example:0.2 .
docker run --rm -it docker-example:0.2 /bin/bash
We can type ng version at the command prompt and verify that the correct version of Angular is installed.
Caching layers
Note that we saw the following in the build output:
CACHED [1/2] FROM docker.io/library/node:6.9
Docker caches layers it builds.
When it detects that the previous layers would not be changed it can reuse the cached layers instead of building them again.
In this case it realised it had a cached version of the FROM node command so it did not download it again.
For this reason it’s best to put large operations that don’t change, e.g. installing tools, at the start of the Dockerfile so that you don’t have to run that step every time.
Restoring packages
We typically create a working directory in which to build our app using the WORKDIR <<path>> command.
Since we want to minimise the amount of times we need to build a layer with a long-running task, we typically copy any files used by our package manager first. These files change rarely so if we can do a package restore before copying the rest of source code, we should be able to cache the package restore and use that cached version to speed up future builds.
This means, e.g., copying package.json for npm and *.csproj for .Net.
We copy files using COPY <<source-path>> <<destination-path>>. Finally we’ll use RUN to do the package restore.
WORKDIR /app
COPY    package.json .
RUN     npm install
We can run this and validate it has worked by running the following command.
docker build -t docker-example:0.3 .
docker run --rm -it docker-example:0.3 /bin/bash

# In the container
ls
You should see that the app folder has been created and is the default directory. package.json has been copied and you have a suitably over-large node_modules folder.
Limiting what is copied using .dockerignore
Recall that the entire contents of the Context path are sent to the docker engine? This can cause 2 problems.
Firstly if we are sending too much data to the engine it can cause performance problems.
Secondly we may be adding more files than we need to our docker image and bloating it.
We solve this problem using a .dockerignore file at the root of our context. This works in much the same way as a .gitignore details are here.
For now we’ll create the following .dockerignore next to our Dockerfile
**/.git
**/.vscode
**/node_modules/
**/dist
Our biggest concern here is excluding the gigantic node_modules folder and anything sensitive/unnecessary in the git or vscode folders. You should exclude anything else related to your project, particularly build outputs as we will be building in the container. In this case we exclude the dist folder.
Copy and run the application
We can now copy the rest of the source code across.
For this example we’d like the image to always run npm run start on start up so we’ll use the CMD command in the Dockerfile
COPY  . .
CMD   ["npm", "run", "start", "--", "--host", "0.0.0.0"]
Note that we pass the command and its parameters as an array of strings. If we simply passed "npm run start" the container would look for a file called npm run start to run.
We can now build and serve the application remembering to forward port 4200 on the container to a suitable port on the outside world
docker build -t docker-example:0.4 .
docker run --rm -it -p 4200:4200 docker-example:0.4
You can now visit http://localhost:4200 in a browser to see the fruits of your labour.
N.B.
By default
npm run startwill serve content onlocalhostwhich is only accessible inside the container.
We need to listen on all network interfaces so we use the host
0.0.0.0(instead of127.0.0.1)
The actual command run on the container is
npm run start -- --host 0.0.0.0
docker